Spending a lot of time, effort and money adapting your gravel bike for a particular cycling event might sound like an extravagance and not something that most of us would consider. Changing a set of tyres, sure, but more complicated and time-consuming adaptations? That might be a step too far. But, if the event shares the route of the infamous Paris-Roubaix race, though, then that changes things quite significantly, doesn't it?
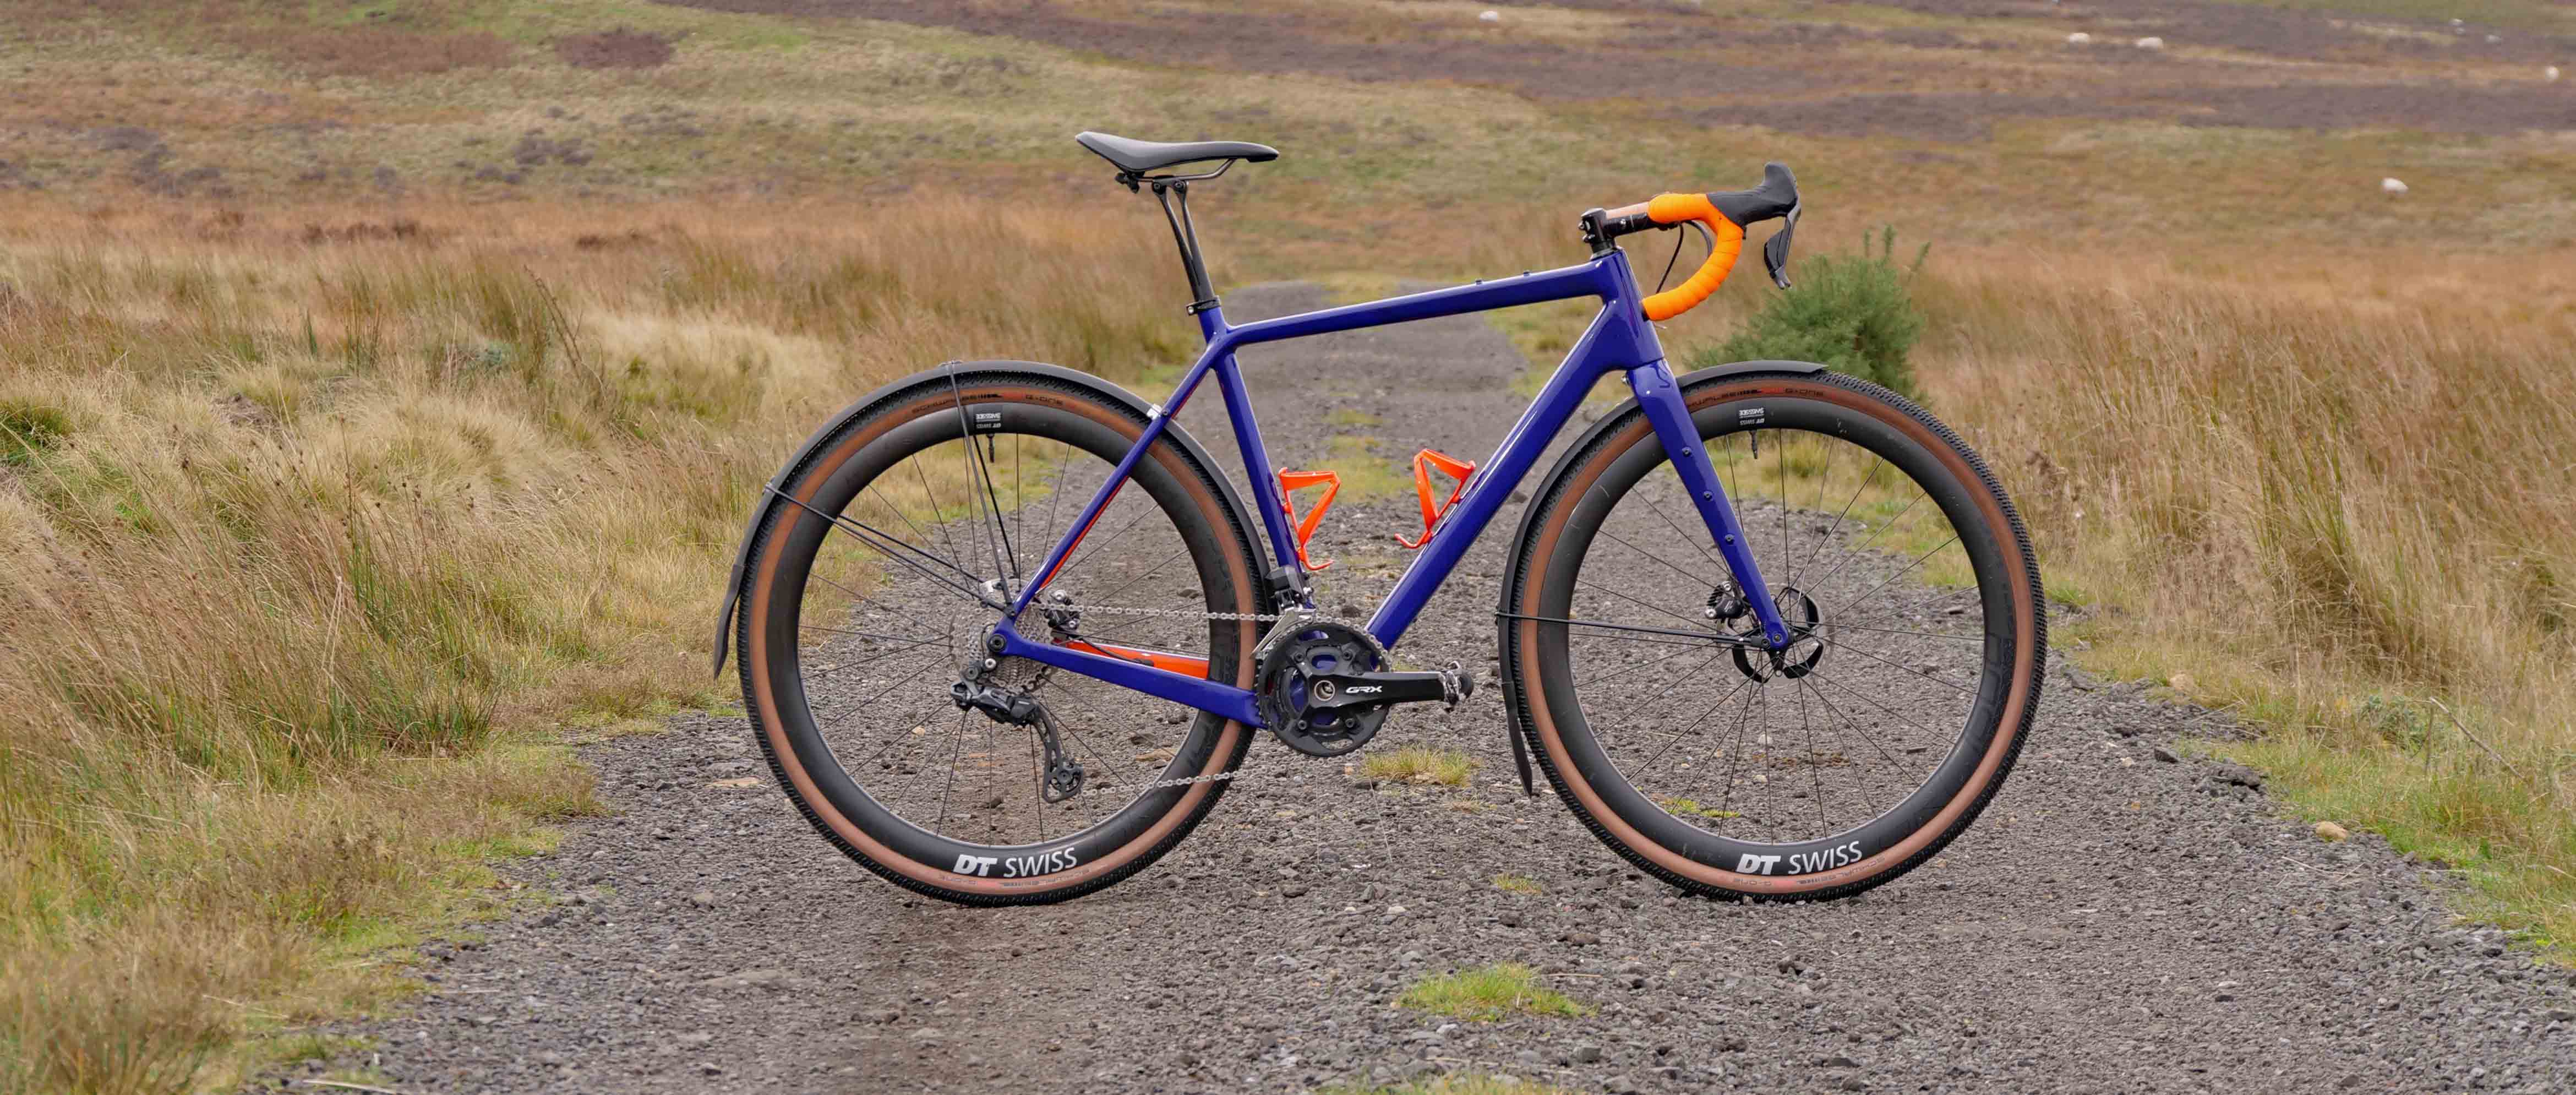
Until recently, this is how my gravel bike looked. I’d spent a long time researching what to buy and how to kit it out, based on several prerequisites, some of which might sound a little odd:
- First of all, it had to have clearance for 700x50mm tyres. My particular type of gravel riding is barely disguised XC MTB riding at times, so I needed a bike with capacity for ‘big boots’ for when the trails got a little on the rowdy side. My chosen frameset was a CFR696, built and custom-painted for me by the Chinese brand Carbonda. Although not super common in the UK, they have a great reputation and Carbonda build many ‘white label’ frames for other more famous brands too.
- Although this will make me sound deeply unfashionable, I really (really) love riding with a 2x chainset. Pretty much all my rides include 800-1000m of elevation gain and a frequently used return route to where I live includes a couple of sections of climbing that are steeper than 15% gradient. No matter how fit you are, having a good range of gears (including a bail-out option) pays dividends and the combination of 31-46 chainset and 11-34 cassette offers me Goldilocks choices for climbing and descending. I’m completely hooked on electronic gears, so I’ve gone for Shimano’s GRX815 Di2 groupset.
- As well as being hilly, the area where I ride seems to be cold and wet for half the year, which means proper mudguards are essential. If you want reliable, sleek-looking and most importantly, rattle-free wet weather coverage, you need a bike with eyelets to fit proper mudguards. Fitting mudguards dictates my tyre size choice, so during the wetter months, I use 700x45mm tyres.
- Contact points are personal, but also critical. I use one of Canyon’s VCLS seatposts for the comfort it offers. The same goes for my Fizik saddle, 3T bars and super-thick bar tape. They’re all designed to offer maximum possible comfort.
When I first started thinking about riding in the Paris-Roubaix Challenge (which includes more than 50km of cobbles in the 170km overall distance), my first decision was about what tyres to go for. The pros, who race over an extended version of the course I rode, are generally limited to a maximum tyre size of 34-36mm (as they are usually riding on their ‘standard’ sponsor-provided road bikes). Seeing as I’m not an elite-level sponsored rider, I could ride whatever frame I wanted, which meant I could also run much bigger volume tyres. Happy Days!
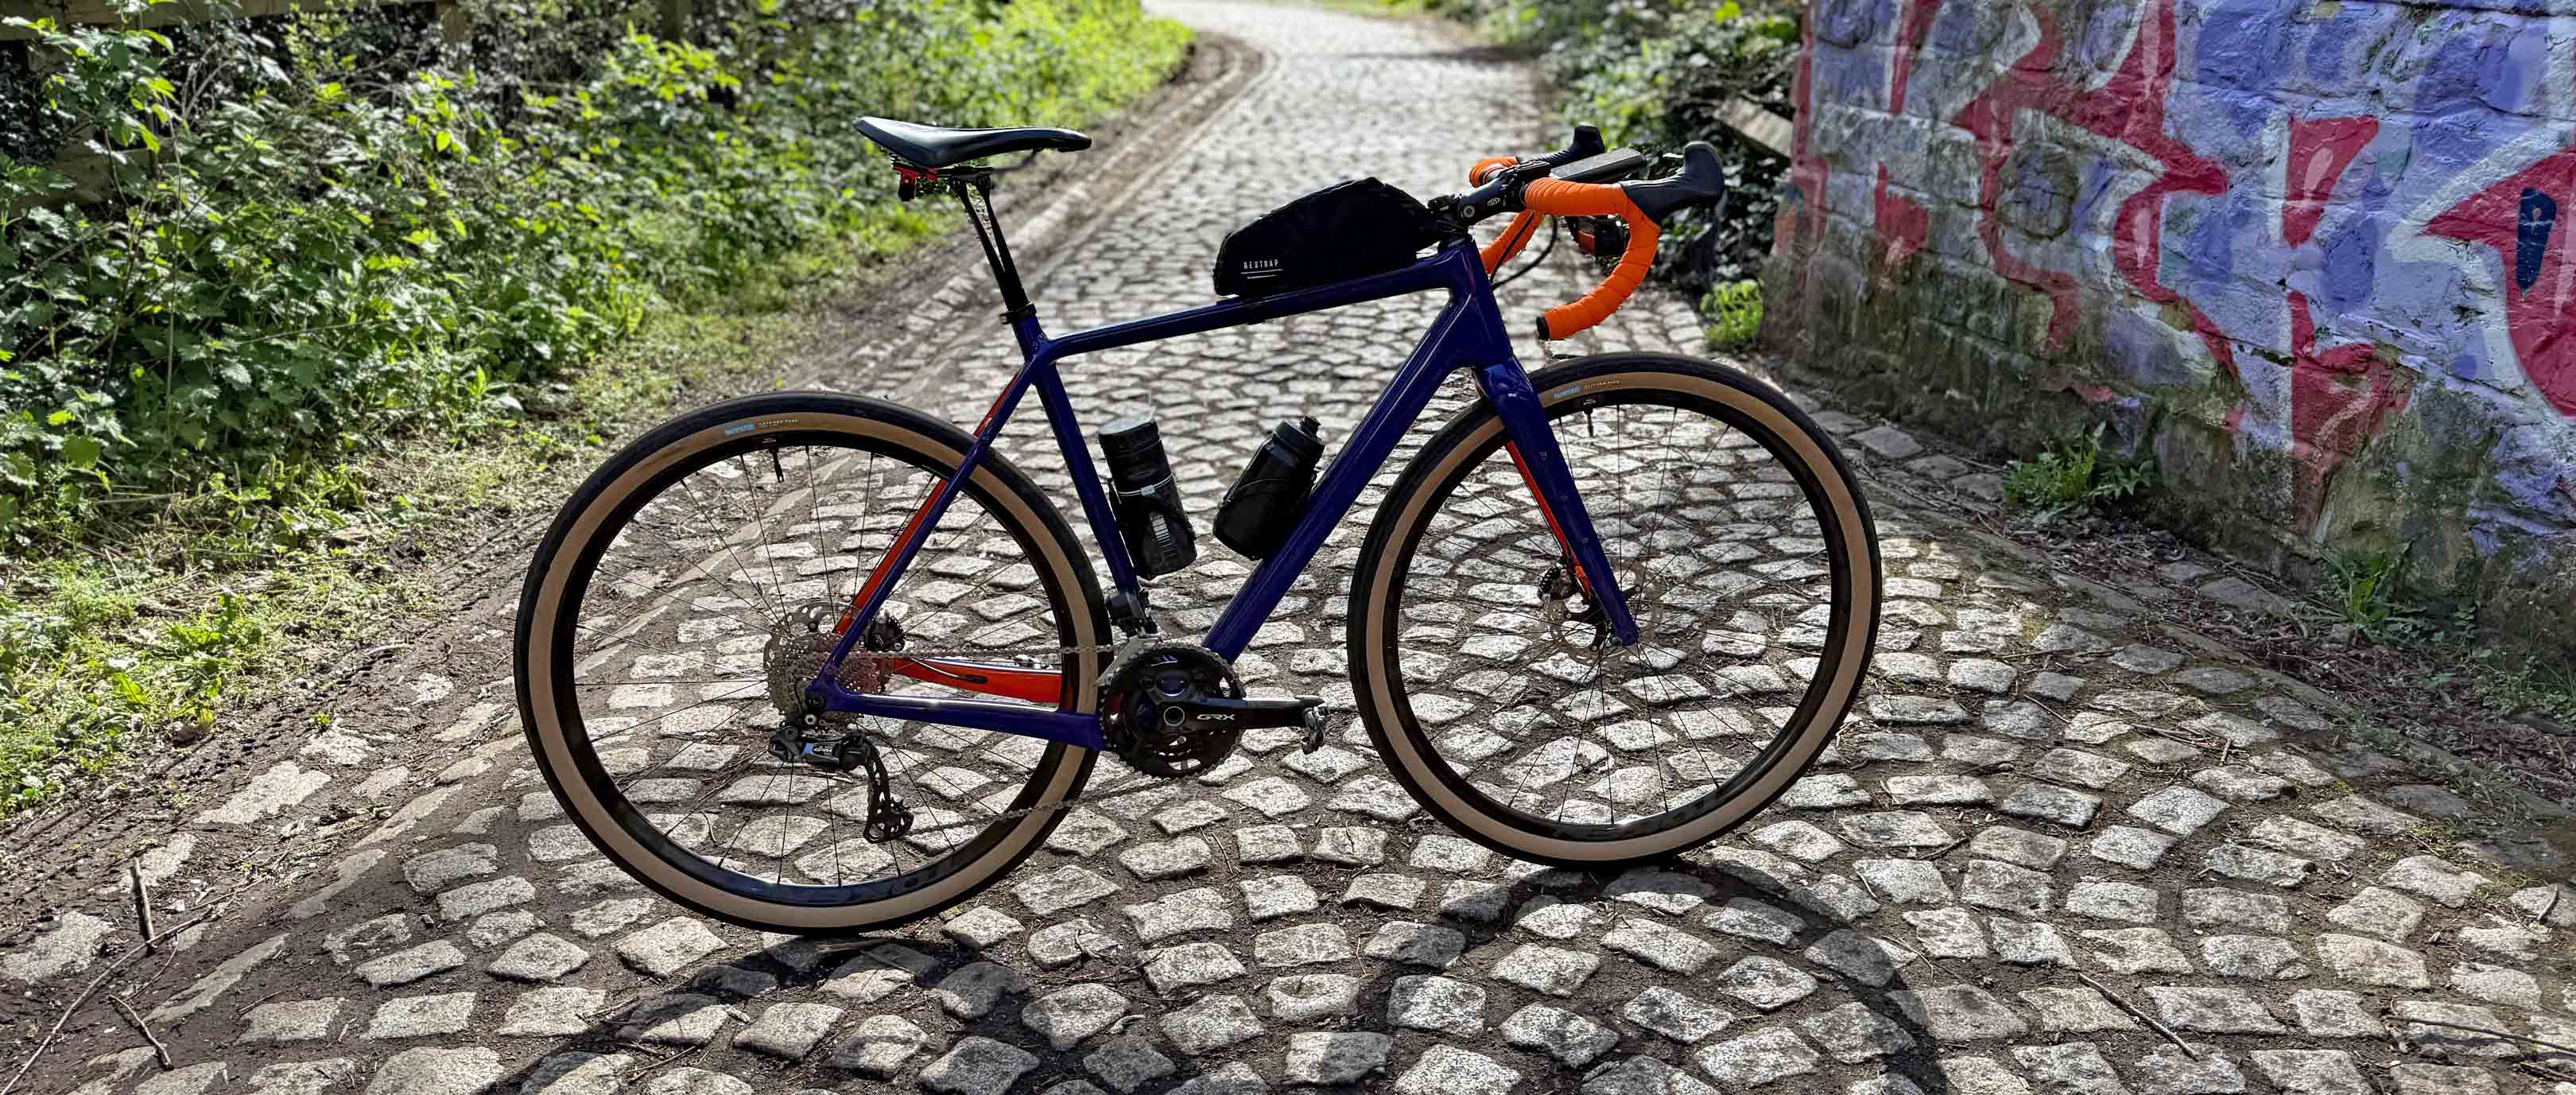
The granite cobbles of northern France are enormous, subject to appalling winter weather and are frequently battered by heavy agricultural equipment, which means the way they’re laid feels inconsistent and there are often huge gaps between them. Riding cobbles at speed subjects tyres to unbelievable amounts of stress (you only have to witness the puncture carnage in both the men’s and women’s editions of this year’s pro race to realise what a hard time the tyres have), so I needed tyres which were supple, tough and fast rolling. Not an easy combination to find, but one brand stood out – René Herse. After quite a bit of deliberation, I went for their Hatcher Pass tyres, which come in a 700x48mm size – perfect for turning granite into velvet (or so I hoped). As well as their well-regarded ride characteristics, the Hatcher Pass tyres are phenomenally light – less than 500g in the 700x48mm size. Fitting them to my gravel bike knocked off an impressive 500g from the overall weight! My only slight concern for the Hatcher Pass tyres was their relative lack of tread. I’d deliberately ridden as many of my local cobbled streets in wet weather as I could to test their grip, so I was confident in their capabilities, but if the forecast for the event had predicted torrential rain, I might have switched to something more treaded. In the end, we had bone-dry, dusty conditions during the event and the tyres were AMAZING.
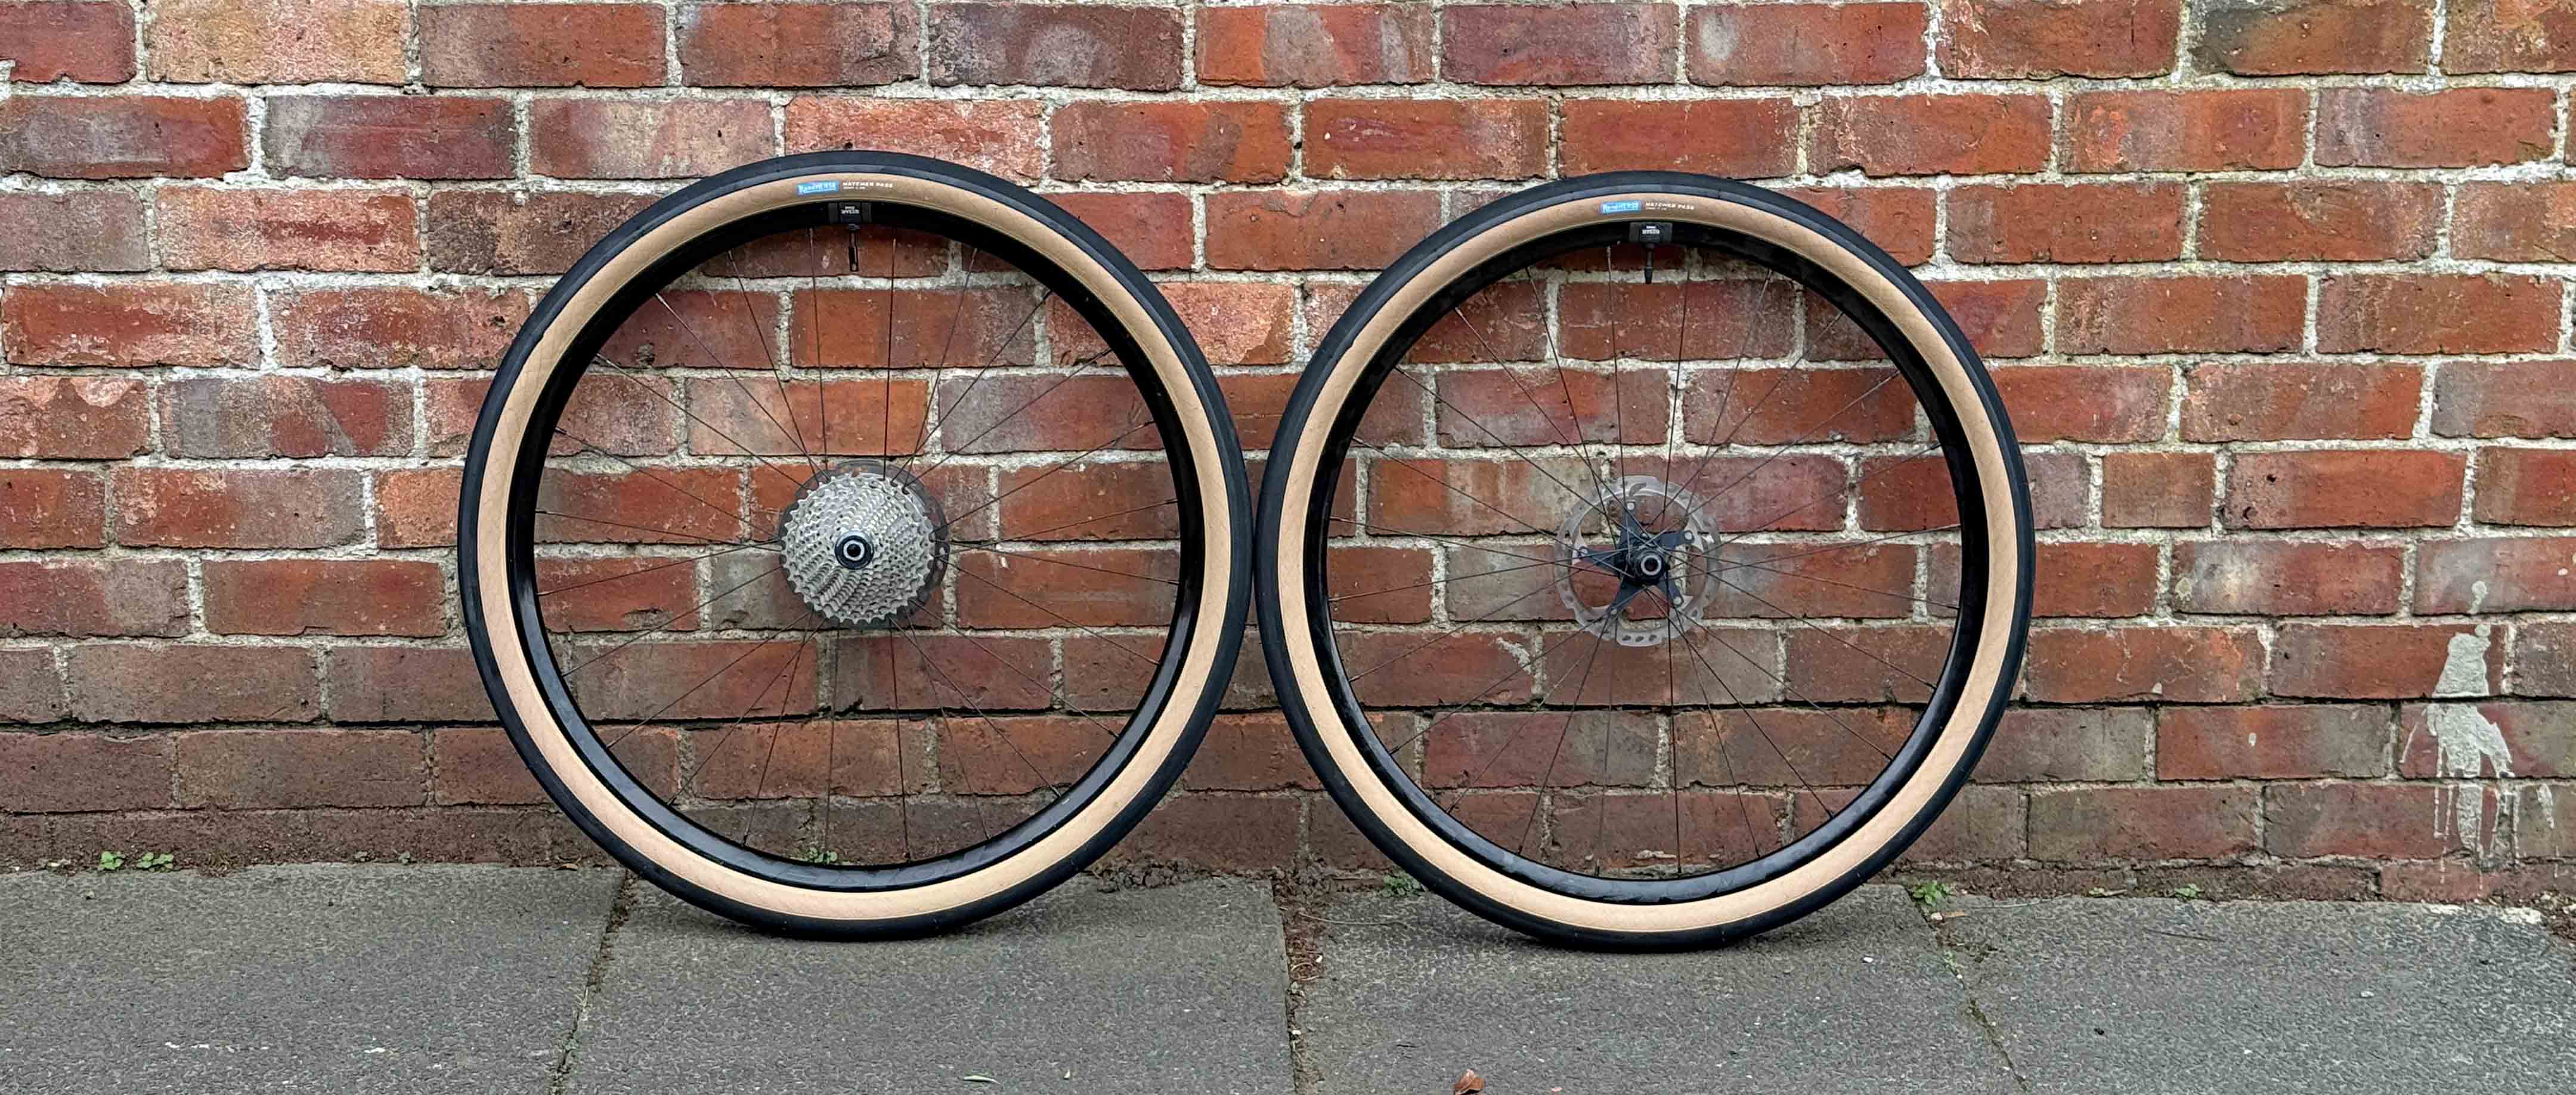
I really love the look, feel and sound of deep-section carbon wheels, but my normal choice of DTSwiss GRC 1400 Spline Disc wheels are very stiff (and arguably, too expensive to risk smashing then into France’s finest granite blocks), so instead I decided to use a spare set of mid-price aluminium wheels that I had hanging up in my garage. I figured that the rims, being less stiff, would offer a more compliant ride and the fact it also meant that I saved a bit of a weight too was an extra bonus.
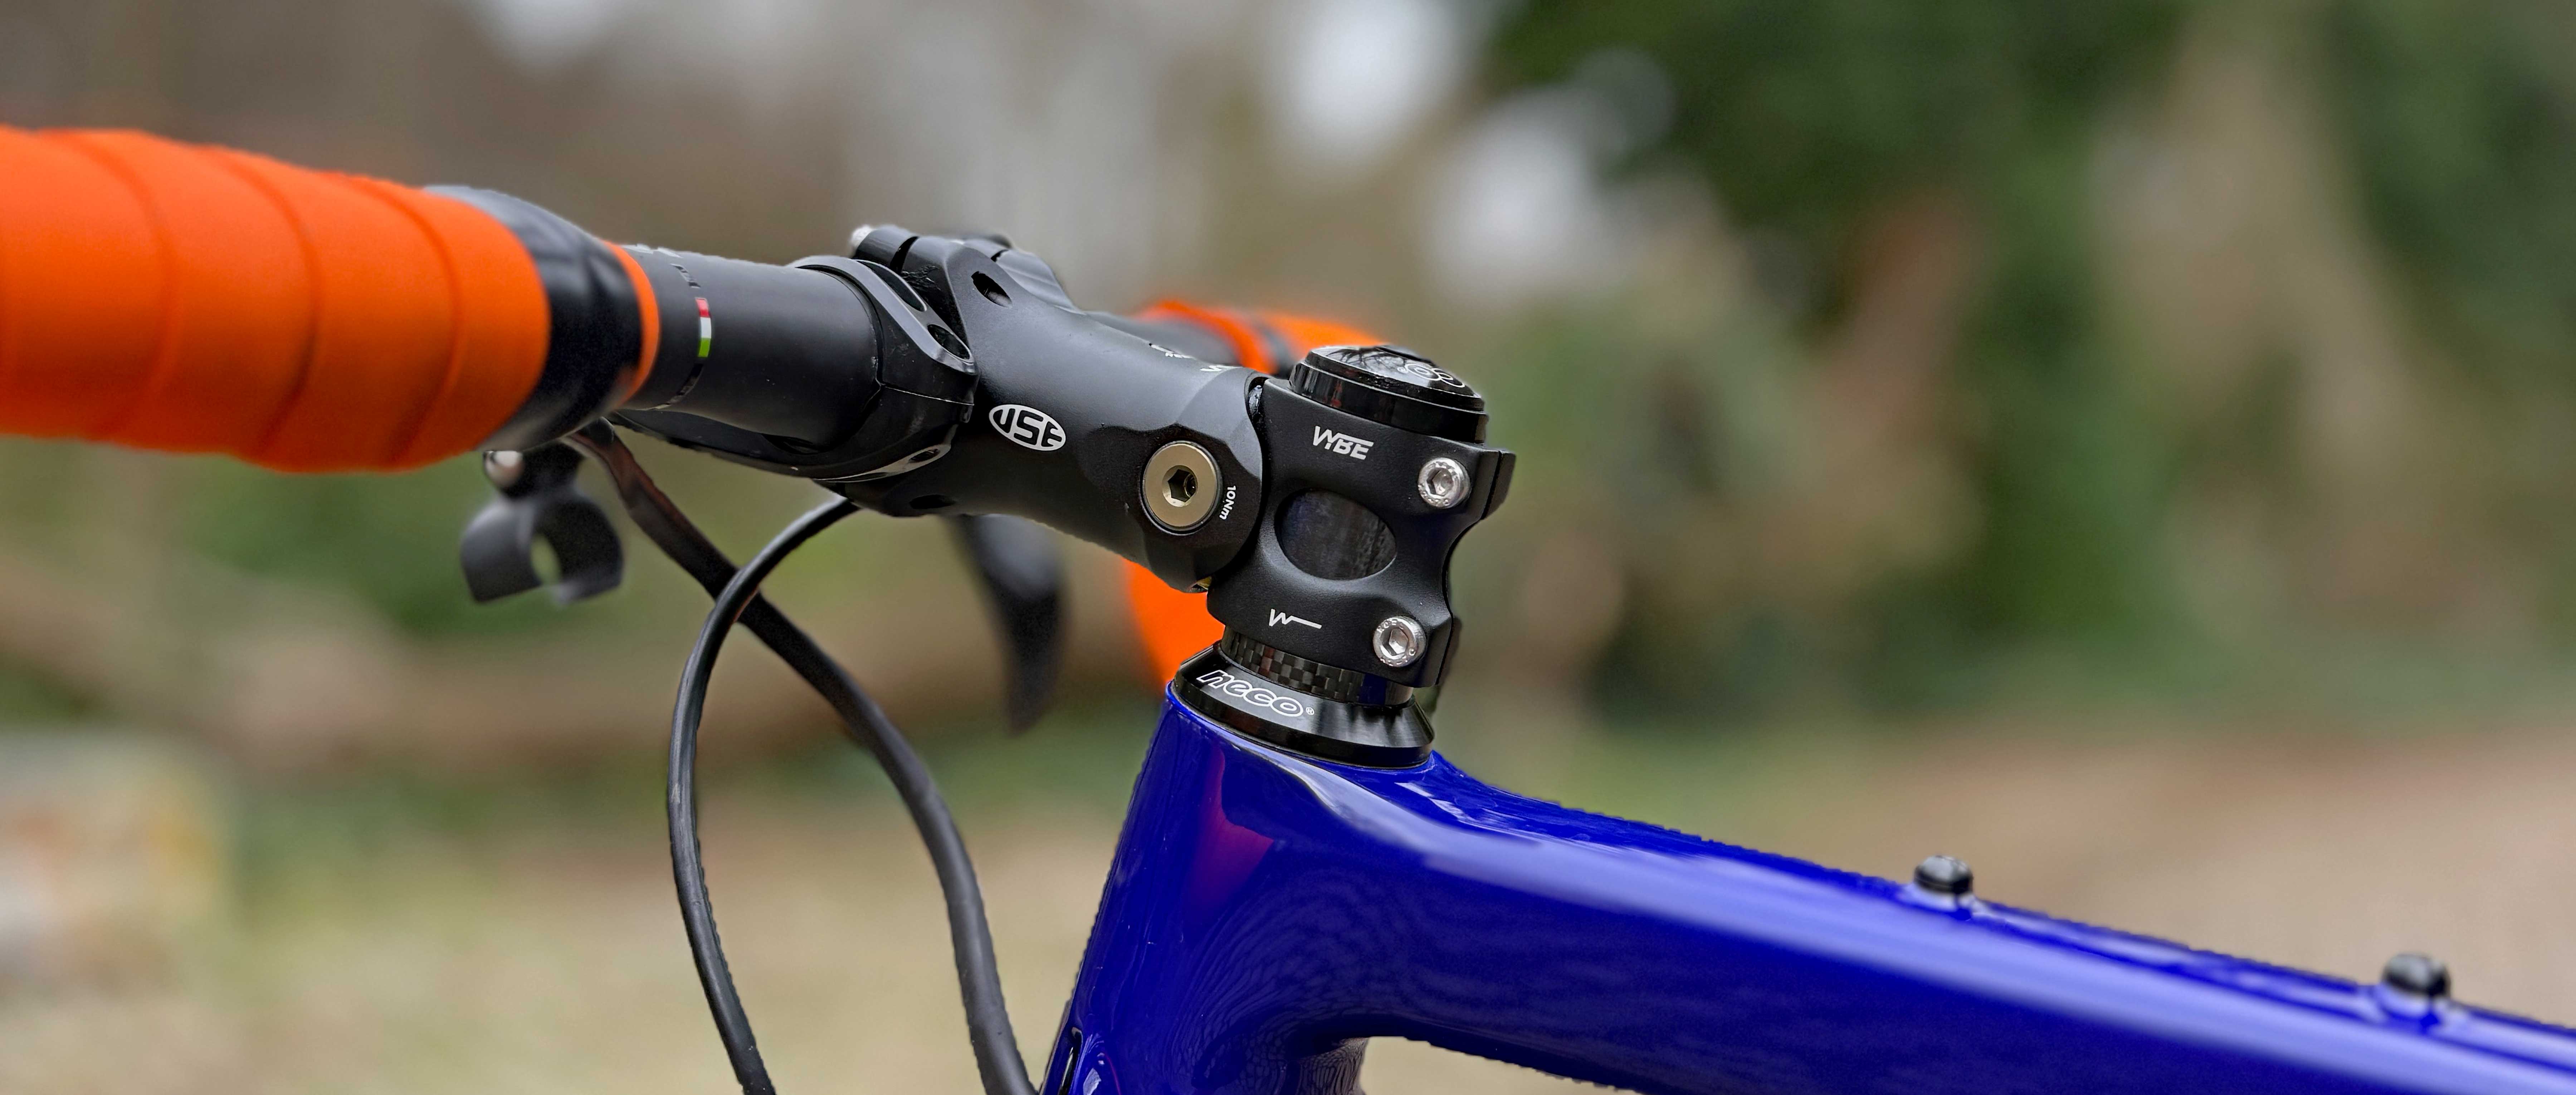
Comfort is king/queen at Roubaix and that meant using every trick I could think of to reduce the vibration getting from the road to my body. At the front end of my bike, I used USE’s fantastic VYBE stem. This had proved to be a revelation during some earlier testing, so it was an absolute no-brainer to use during the event itself. Combined with a lightweight, flexible carbon bar and some super thick bar tape, I ended the event without a single blister and none of the pain/discomfort in my hands, wrists, arms or shoulders that I had been expecting.
At the back of the bike, suspension duties were taken care of by one of Canyon’s VCLS seatposts. Although lightweight, this seatpost offers around 20mm of cobble-busting comfort and thanks to its simple design, there’s little to go wrong, which offers an additional level of mental, as well as physical, comfort.
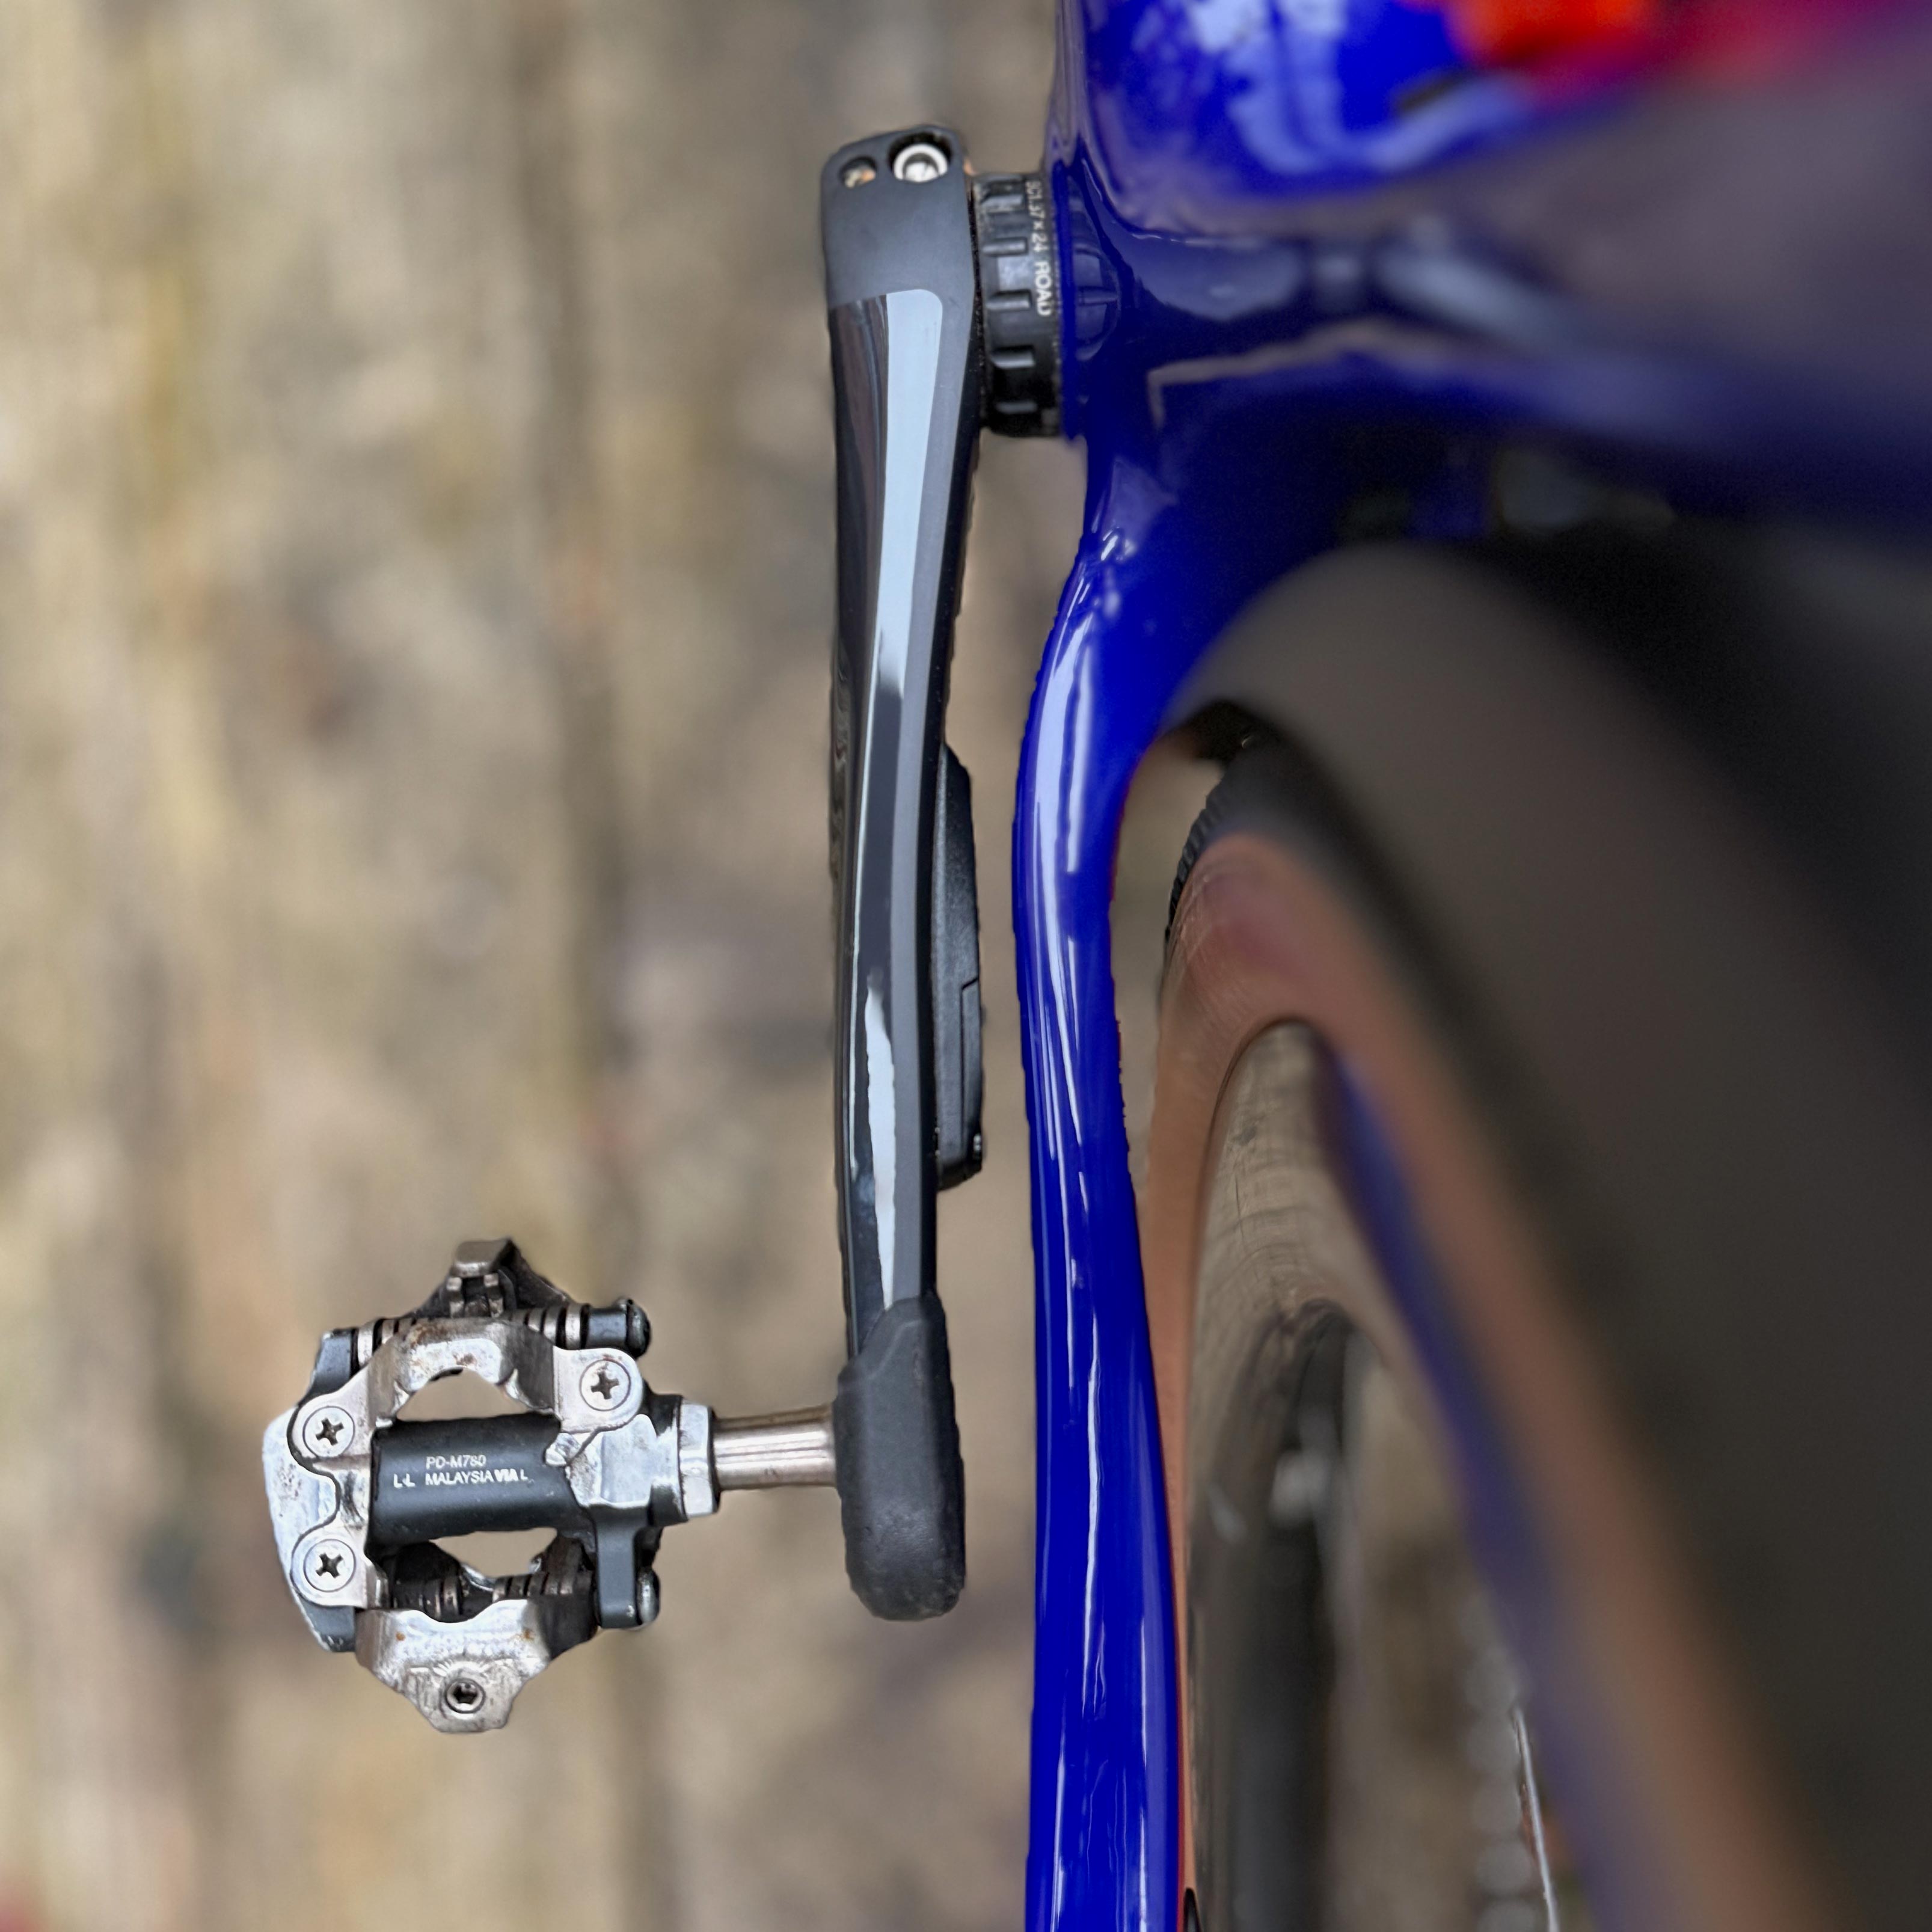
Although not an aide to comfort or speed, I decided to use a 4iiii PRECISION 3+ powermeter during the Paris-Roubaix Challenge. My logic for this was all about pacing – getting to the end of a 170km event means you need to get your speed right. You don’t want to use up all your energy reserves too soon, but equally, we had to make it safely past the four mandatory time cut-off points on the course, which meant keeping a constant eye on our pacing. I used the powermeter to gauge my effort and to make sure I didn’t get overly excited on the cobbled sections of the route. Comparing my relatively puny output with that of the pros a few days after the race itself was quite hilarious, but it was also interesting to compare my power output to some of my ride buddies. One of them in particular is super strong, but is relatively new to away-from-the-road group riding. At the end of the PR Challenge, we briefly discussed our relative power outputs and despite finishing side by side, I’d managed to average 30% less power output than he had. Some of that would be down to luck, but some of it was down to my greater experience and knowledge of which wheels to follow in a bunch, saving energy in the process. Seeing that laid out in black & white was quite eye-opening.
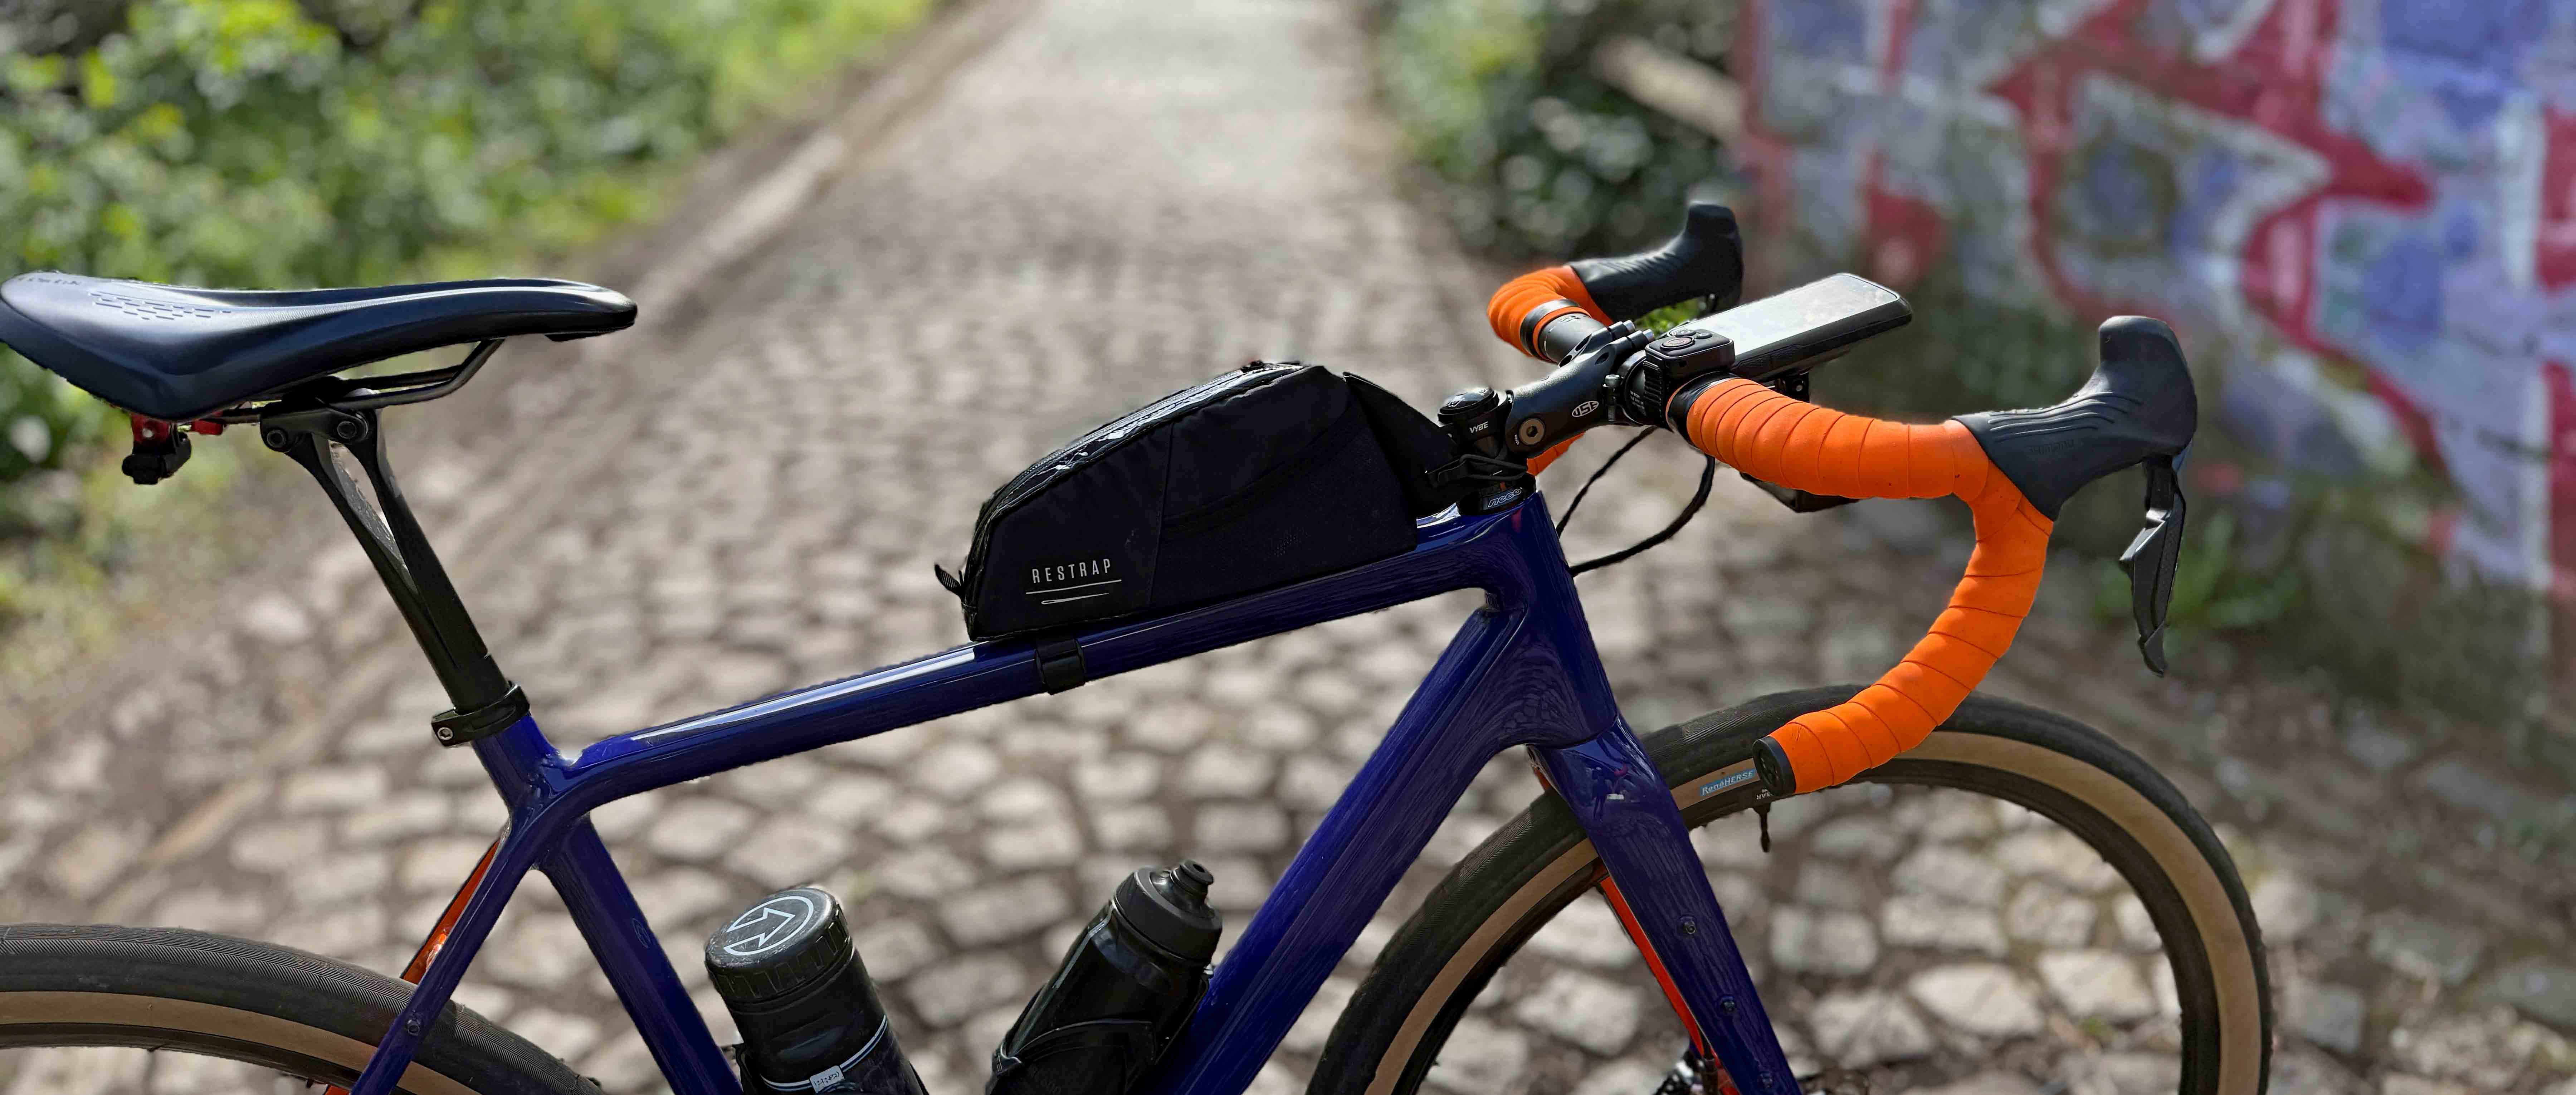
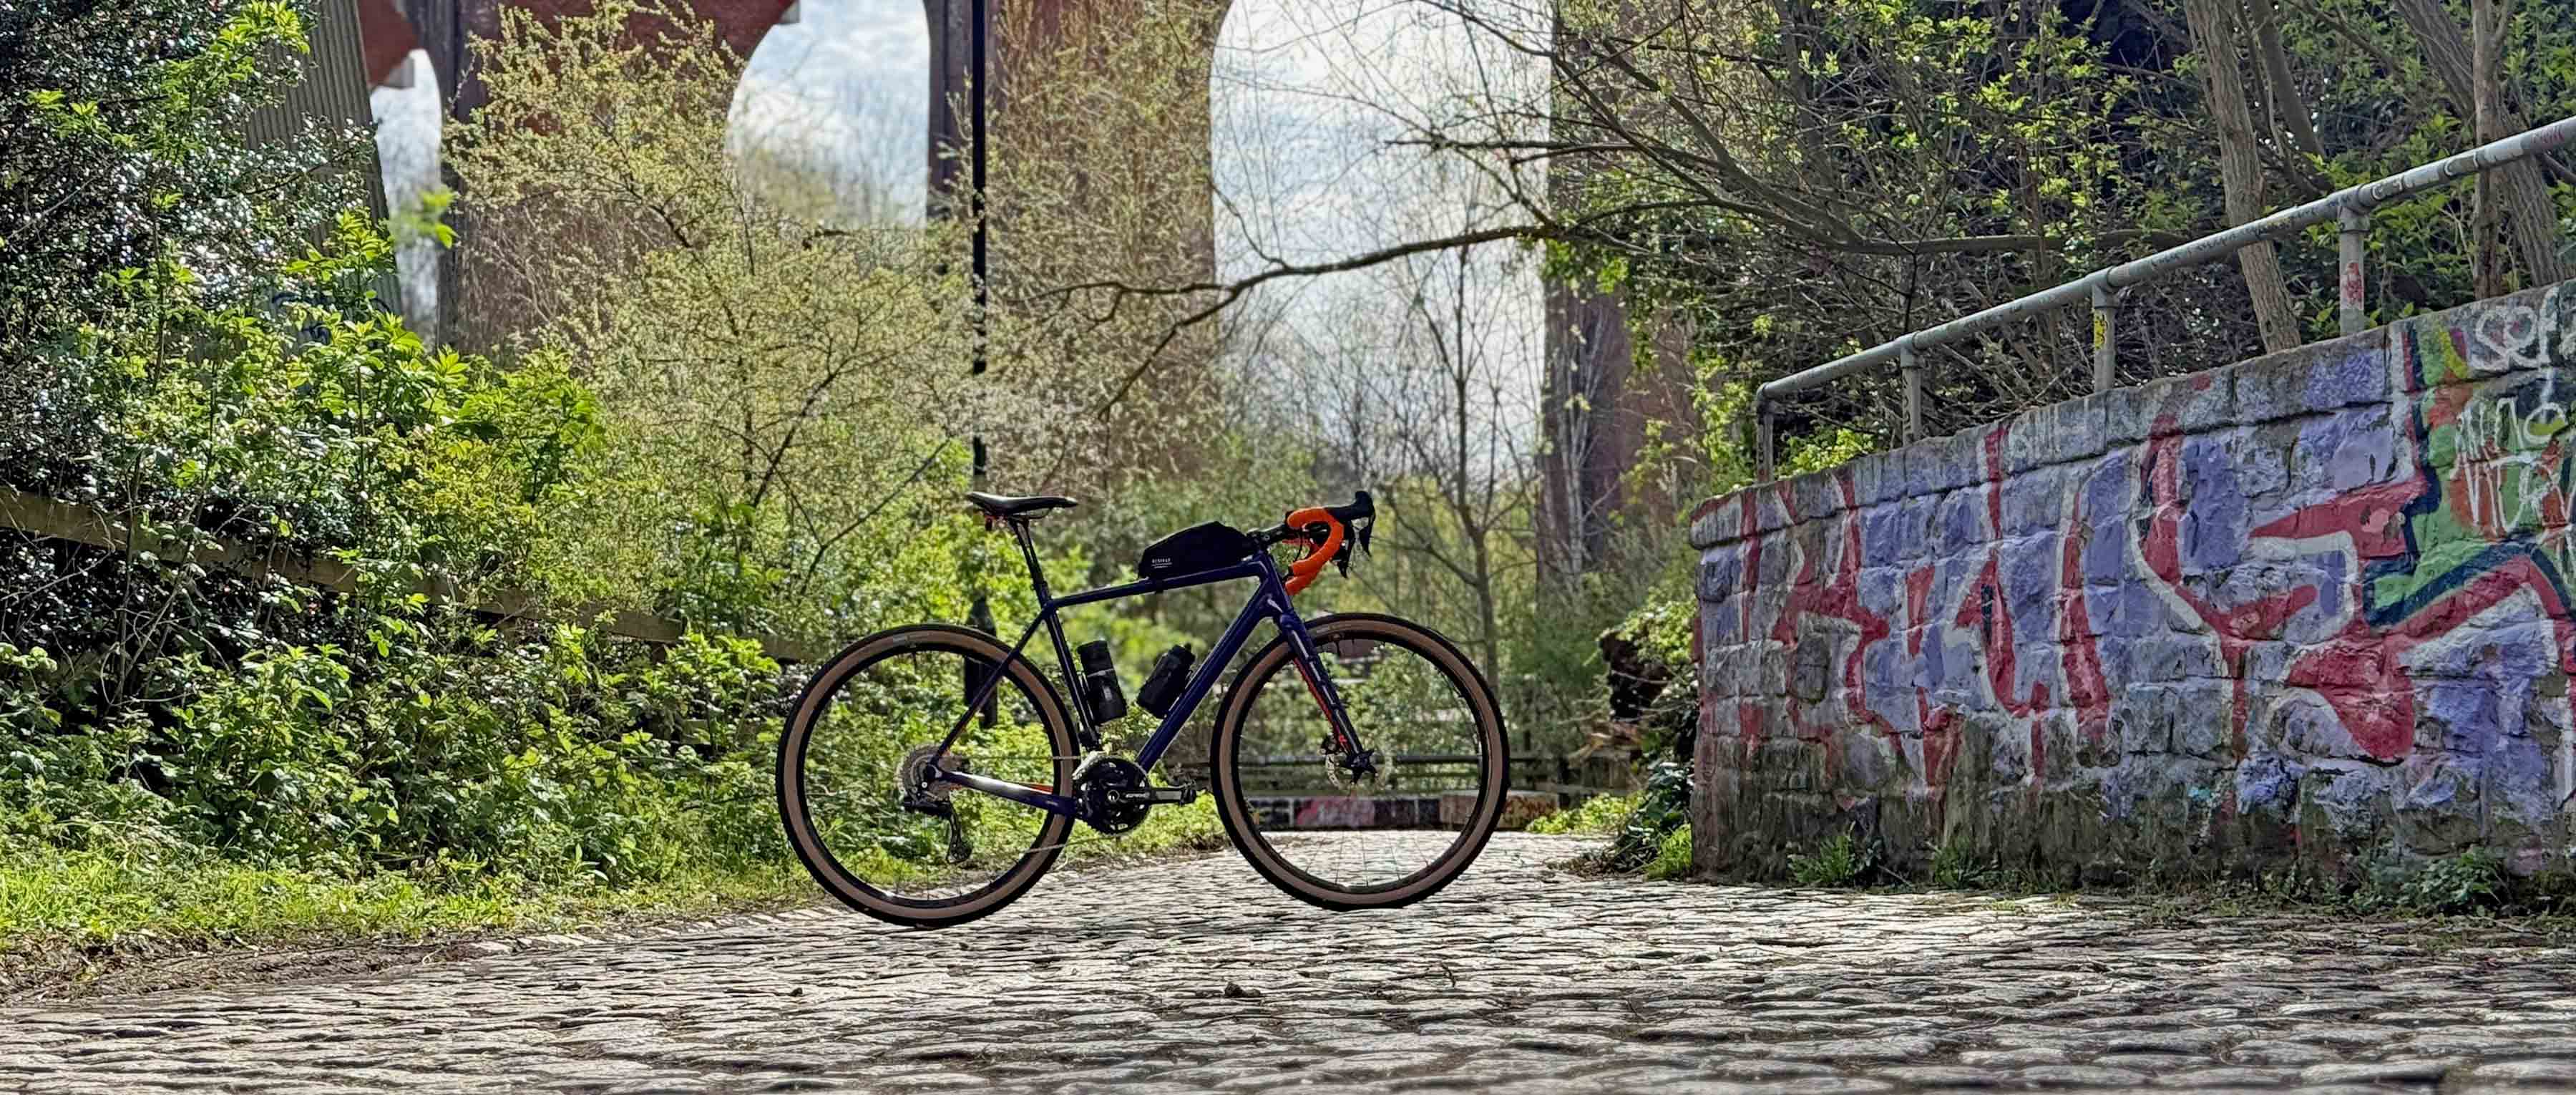
Also in the useful-but-not-mandatory category are my top tube bag (one of Restrap’s Race Top Tube models), which allowed me to easily access energy bars and gels even when riding on the cobbles (and have somewhere to easily stash the empty wrappers afterwards). I fitted one of DJI’s fantastic Osmo Action 6 cameras and an aftermarket Bluetooth shutter release button to my saddle rails/bars to allow me to capture (almost) hands-free images from the ride. Although having the camera mounted somewhere else on my bike meant I couldn’t see the screen, the Bluetooth trigger worked faultlessly and I managed to snag some really captivating shots without the risk of having to ride one-handed to use my phone (my normal manner of shooting on-bike images). Finally, I used a Wahoo Element Ace bike computer to display the course map and record my ride. The big screen was fantastic and I could clearly see the route and all the data I needed, no matter how hideous the cobbles were.
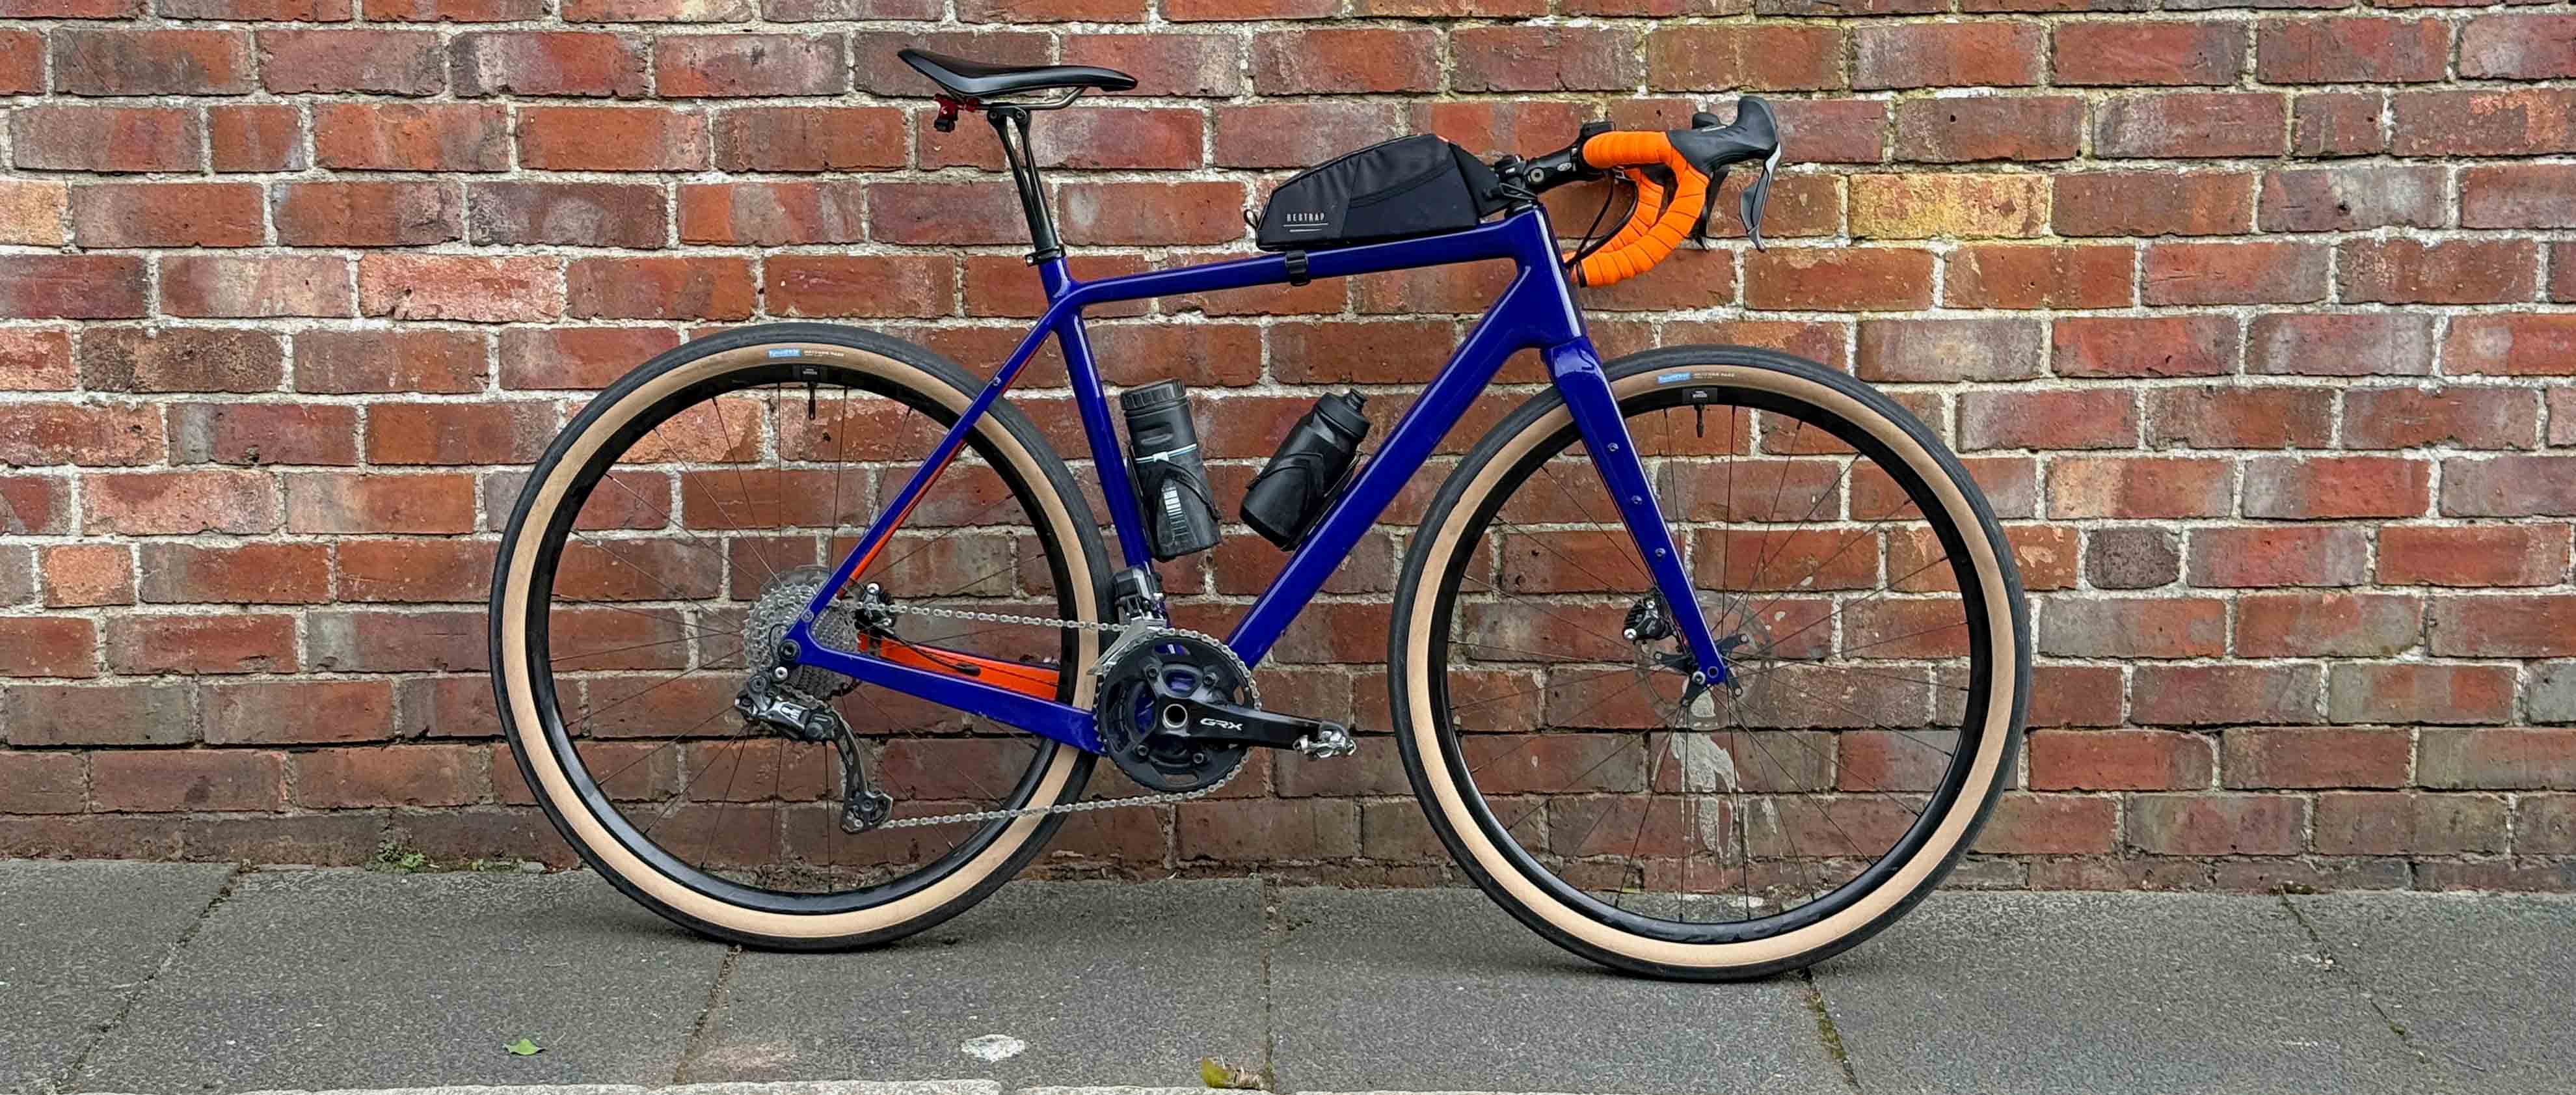
The final build, complete with tool/spares/first aid bottle and a bottle full of energy drink, was a little different looking to many of the bikes that we witnessed in the event (and was significantly different to anything you’d ever see the pro peloton using!) It wasn’t the lightest bike there by any means and the ‘look’ might polarise opinions a little, but the ride quality was outstanding.

Image courtesy of Sportograf
What was amazing (and really quite unexpected) at the end of the event was that I felt perfectly ok! I had been training hard for six months in the run-up, so I was decently fit, but I still expected to feel absolutely obliterated by the time I crossed the finish line. We had been lucky in that we had a tailwind for the first half of the route, which certainly helped, but I’d also absolutely hammered some of the cobbled sections, including the fearsome 5* rated Trouée d'Arenberg section (which I managed to ride at an average speed of 26 kph and generate a pretty consistent 300 watts of power), so I expected to be lying down in a sweaty mess at the finish line! The fitness training and efficient feeding during the event (thanks to Matt Hart from Torq for his sage advice) paid dividends, but my bike set-up made a huge difference and meant I really (really) enjoyed the ride, rather than feeling broken at the end. Not that it's all that important, but my Strava data from the ride showed it was my fastest ever 100 miles on a bike. Considering just how brutal some of the cobbled sections were, that tells you a lot about how great my bike set-up was.
Is it worth spending so much effort to tailor your bike set-up for a particular event? Only you can decide that. But in my case, it was worth every bit of time and money that I invested and it meant that riding the Hell of the North was significantly more pleasure than pain.